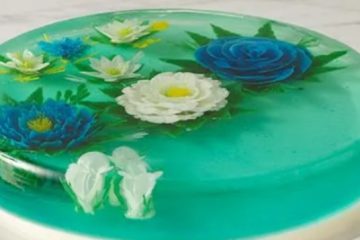
A cake you can draw on? Fluffy cocoa sponge and creamy cream will surely delight the youngest, and at the same time create an opportunity for shared, family baking!
Ingredients
Cake
- Sugar – 220 g
- Eggs – 6 pcs.
- Cocoa – 30 g
- Potato starch – 20 g
- Rapeseed oil – 2 tablespoons
- Baking powder – 1 teaspoon
- Water – 20 ml
- Wheat flour – 140 g
Additional
- Butter – 1 tablespoon
- Food coloring – 1 pc.
- White sugar paste – 500 g
Cream
- Water – 100 ml
- Gelatin – 1 teaspoon
- Agave syrup – 1 teaspoon
- 30% cream – 500 ml
Preparation
Step 1: Beat Eggs with Sugar Separate egg yolks from egg whites. Combine egg whites in a mixing bowl with 1 tablespoon of sugar. Beat at low speed, gradually adding the rest of the sugar. After adding the last portion of sugar, increase the speed.
When the sugar dissolves and the egg whites achieve the consistency of fluffy, pearly foam, reduce the speed and gradually add the egg yolks. Beat for a while until the ingredients combine.
Step 2: Prepare the Cocoa Sponge Cake Combine wheat flour in a bowl with potato starch. Add cocoa and baking powder. Mix. Sift all dry ingredients through a sieve into the eggs beaten with sugar. Knead the dough gently using a kitchen whisk.
When the ingredients start to combine, add water and oil. Mix again until the ingredients are completely combined. Try to mix the batter with decisive but gentle movements to avoid deflating the batter.
Step 3: Bake the Sponge Cake Grease the bottom of the pan with butter and line its sides with baking paper. Pour the sponge batter into the prepared pan. Smooth the batter on top using a silicone spatula.
Bake for about 30 minutes in an oven preheated to 180°C. The sponge should rise to about 4 cm – it’s not necessary to achieve a heavily risen sponge.
Let the baked sponge cake cool. You can remove the sides of the pan and remove the baking paper to cool the cake faster.
Step 4: Cut the Sponge Cake Trim the uneven top layer of the cooled sponge cake. Cut the sponge cake in half to obtain 2 thinner layers. Place the bottom layer back into the pan and set aside the top layer on a board or countertop. Reassemble the pan in which the sponge cake was baked.
Step 5: Prepare the Cream Whip the very cold cream at medium speed in a mixing bowl. Increase the speed towards the end of whipping. Ultimately, the cream should be stable, but don’t whip it too hard. Try to maintain a creamy consistency.
Soak gelatin in water in a small bowl and stir until dissolved. Add agave syrup.
Add 1 tablespoon of whipped cream to the soaked gelatin with syrup. Mix. Pour the mixture into the whipped cream and gently mix using a kitchen whisk.
Step 6: Assemble the Cake Spread the cream on the sponge layer placed in the pan (leave about 1-2 large tablespoons of cream – we will use it to spread on the top of the cake) and smooth it evenly on top using a spatula.
Cover the cream layer with the second sponge cake layer. Gently press down, additionally smoothing the covered cream layer. Spread the remaining cream thinly over the top of the cake. Wipe the edges of the pan clean from the cream using a paper towel.
Place the cake in the refrigerator for about 40-60 minutes to allow the cream to set.
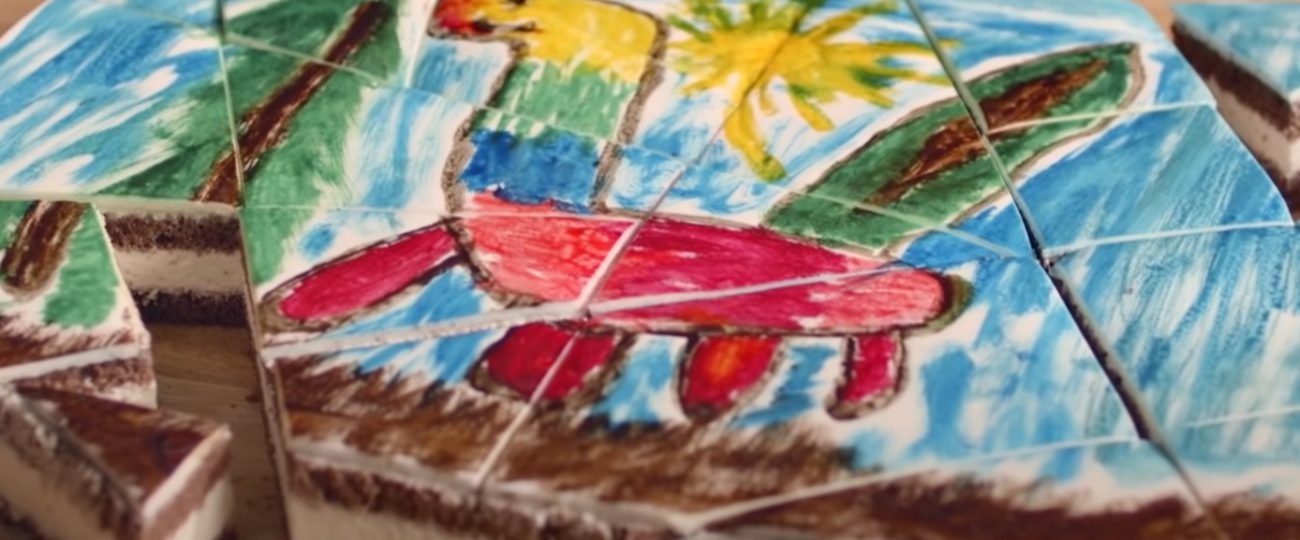
Step 7: Knead the Sugar Paste and Prepare the Drawing Knead the sugar paste on the countertop until it becomes pliable, then roll it out between two sheets of baking paper. You should obtain a thin, rectangular sheet. Remove the baking paper.
Place the drawing on the rolled-out sugar paste, and using the hard end of a brush, draw the outlines and the main elements of the picture in the paste. Remove the drawing.
Paint the outlines of the picture on the paste using dark food coloring. Spread the coloring using a thin brush. Fill in the outlines with colors.
Step 8: Transfer the Drawing onto the Cake Trim the cooled cake around the edges, remove the pan. Gently level the edges of the top cream layer using a flat spatula. Use the pan to mark the shape of the cake on the layer with the drawing. Cut out the drawing using a sharp knife. Knead any excess sugar paste, wrap it in plastic wrap, and set it aside for later use.
Transfer the drawing made on the paste onto the top of the cake and level it on all sides to perfectly fit its edges. At this stage, you can finish the picture by adding the remaining elements.
Step 9: Cut the Puzzle Cake Dampen a sharp knife with water. Cut the cake into irregular pieces – puzzles. After each cut, rinse the knife in water and dampen it again. Serve the cake in its entirety after cutting.